How to Configure MultiTenant SingleDB Plugin with Grails Project and Mysql
Posted By : Tushar Paliwal | 14-Jan-2014
Introduction
MultiTenant-SingleDB plugin is helpful to work with Grails version>1.3.5 . Plugin helps to create muti-tenant application easily with hibernate.Multi-tenant application helps multiple users to work with single instance of application with single database without accessing the others data.
It simply keeps rows with associated tenantId and filter data on the behalf of tenantId from database.It is usually used with SaaS applications.
Tenant Class
Tenant class is used to store tenantId which is used as filter key.We can create our custom tenant class by implementing the interface grails.plugin.multitenant.core.Tenant and overriding the methode Integer tenantId()
Tenant Resolver
Tenant resolver is that point of application that resolves which tenant will deal with the current request.In the most of the cases the tenants are decides on the behalf of URL which is requesting for data.But we can create our own Tenant resolver by implementing the interface grails.plugin.multitenant.core.resolve.TenantResolver and overriding the methode public Integer resolve(HttpServletRequest request)
Multi Tenant Domain classes
The domain classes can be made multi tenant by using the annotation @MultiTenant. The annotation is a part of AST transformation.This adds a new field with the name tenantId in the domain class during complilation process.
Install Grails project with Multi-Tenant plugin
Here i'm creating demo project to illustrate using Grails 2.2.2 with MultiTenant Plugin.I'm using IDE Spring Tool Suite 3.4(STS) with Mysql database.
The first six steps are used for installation of Multi-Tenant plugin.
Step 1 :
Creat grails project by seleting from menu:
File>New>Grails Project

Now click on finish.
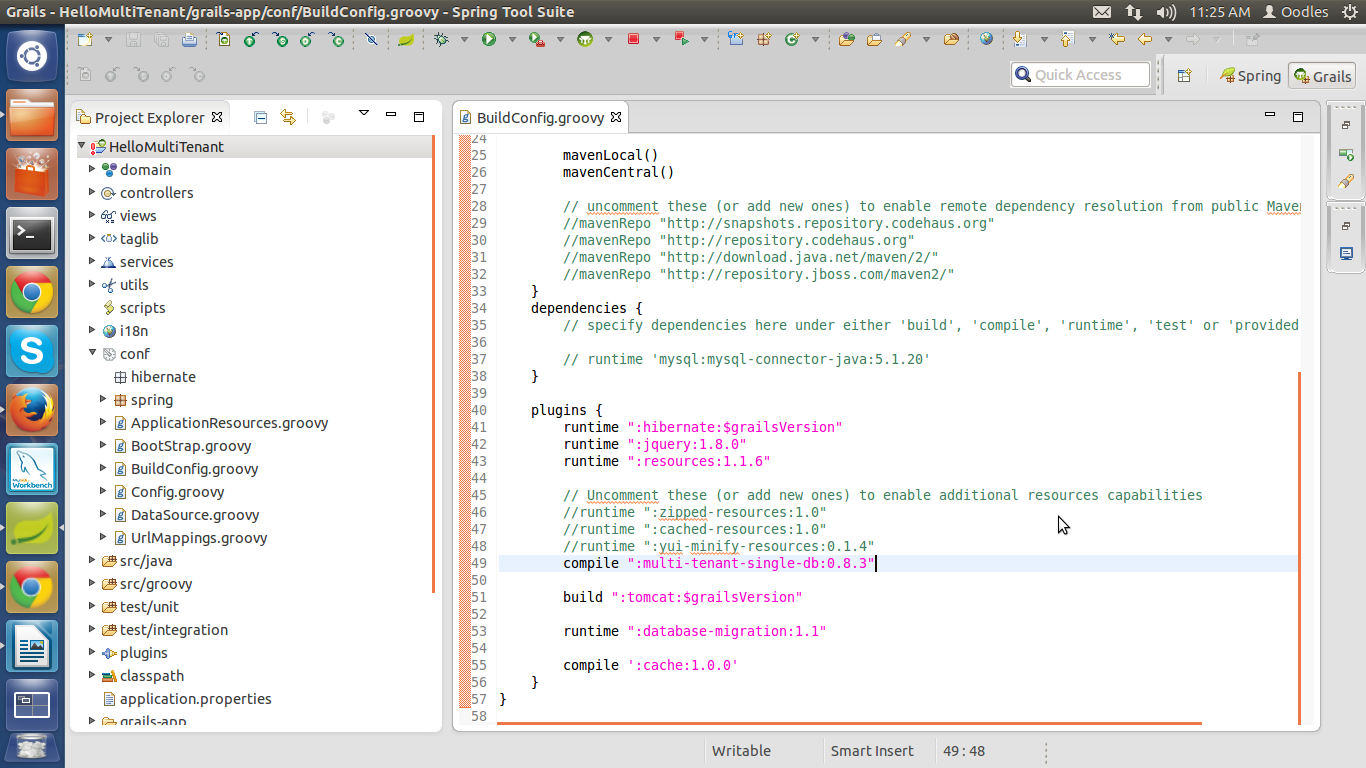
Step 2 :
Now open the BuildConfig.groovy file.
HelloMultiTenant>conf> BuildConfig.groovy
If you are using mysql as a database then make sure there must be an entry of :
  dependencies {

        runtime 'mysql:mysql-connector-java:5.1.20'
    }
Now make an entry in the file which is :
install-plugin multi-tenant-single-db
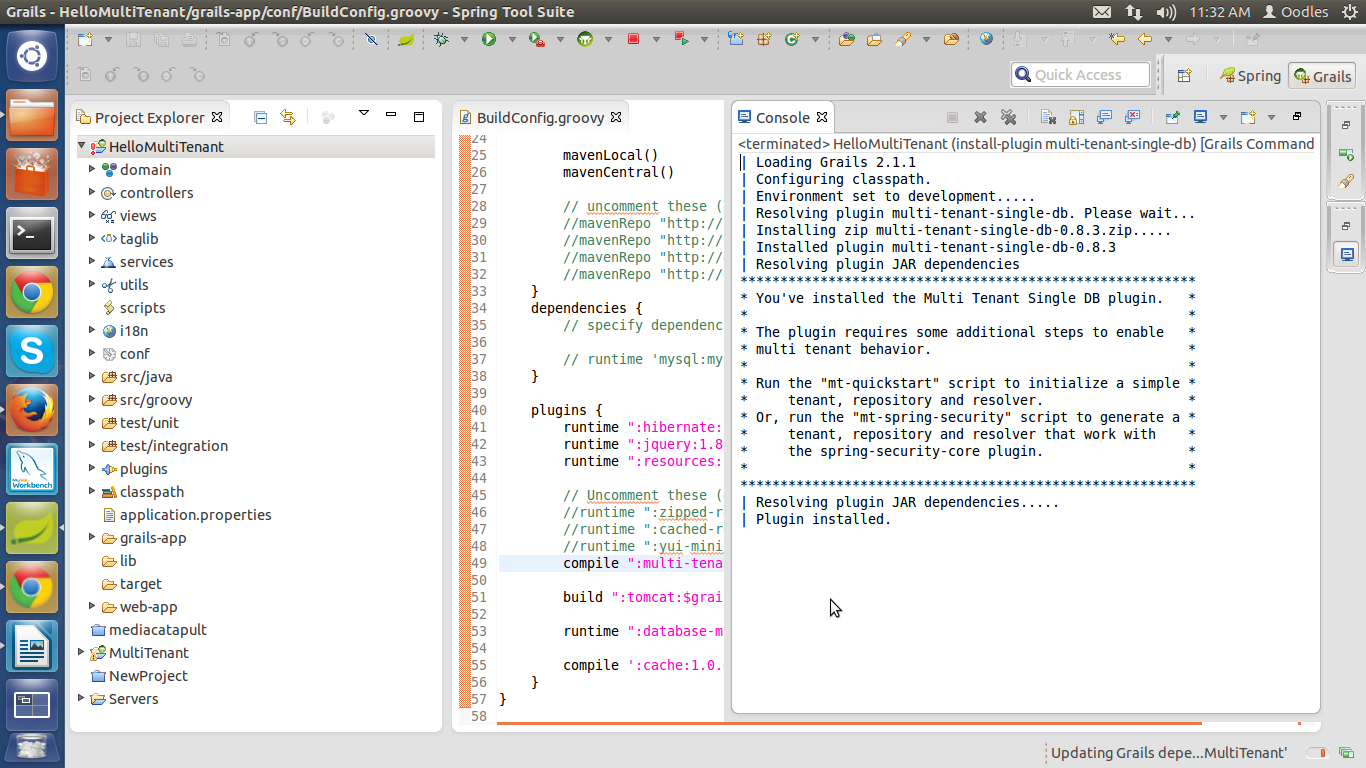
Step 3 :
Now open the grails command prompt and run the script :
install-plugin multi-tenant-single-db
This command is use for installing Multi-Tenant Plugin.which will put plugin in :
HelloMultiTenant>plugins> BuildConfig.groovy
Output at consol :
Step 4 :
Now again open the grails command prompt and run the script :
mt-quickstart DomainTenantResolver CachingTenantRepository Customer
Output at consol :
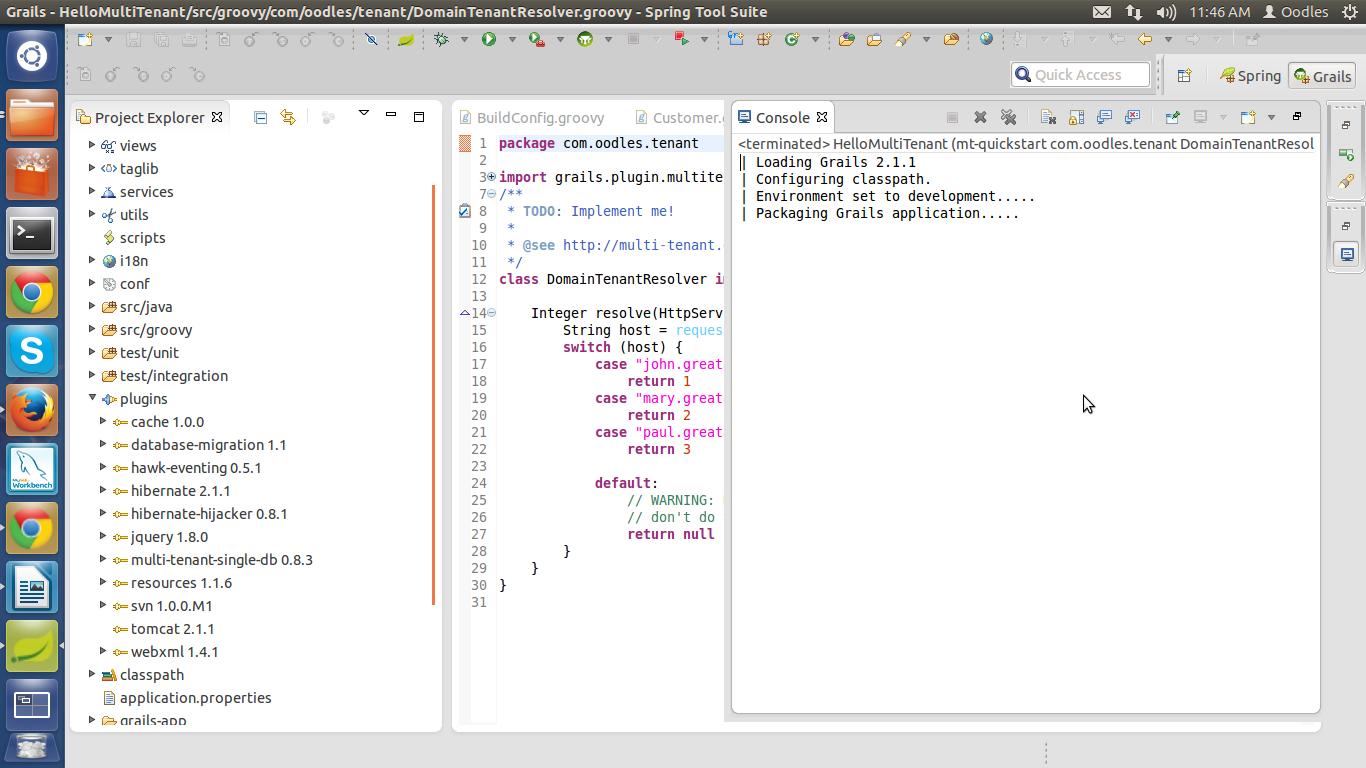
This will create your three groovy files :
Customer.groovy
CachingTenantRepository.groovy
DomainTenantResolver.groovy
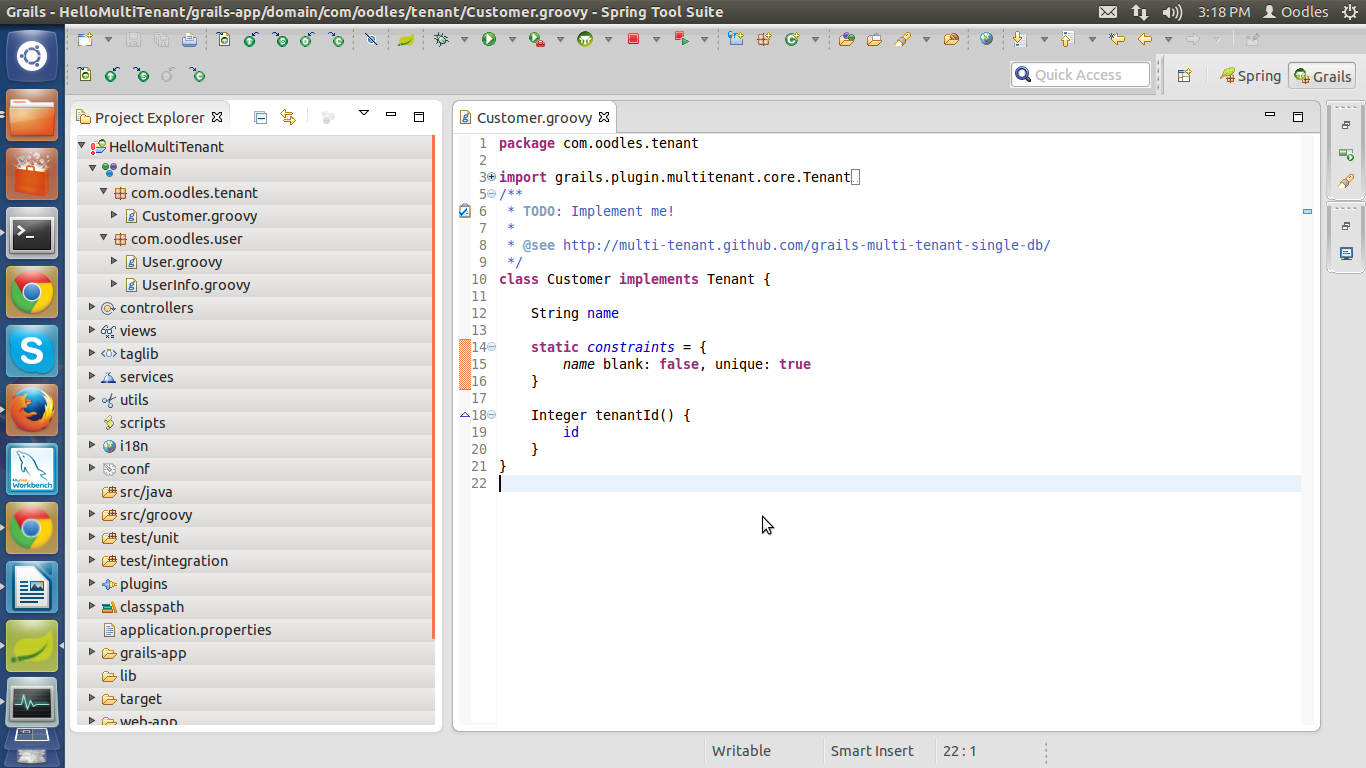
The Customer.groovy is known as Tenant class,DomainTenantResolver.groovy is known as Tenant Resolver.
Here one is kept in :
HelloMultiTenant>domain>package-name>Customer.groovy
Other two are kept in:
HelloMultiTenant>domain>package-name>CachingTenantRepository.groovy
HelloMultiTenant>domain>package-name>DomainTenantResolver.groovy
Files will look something like this.
Customer.groovy
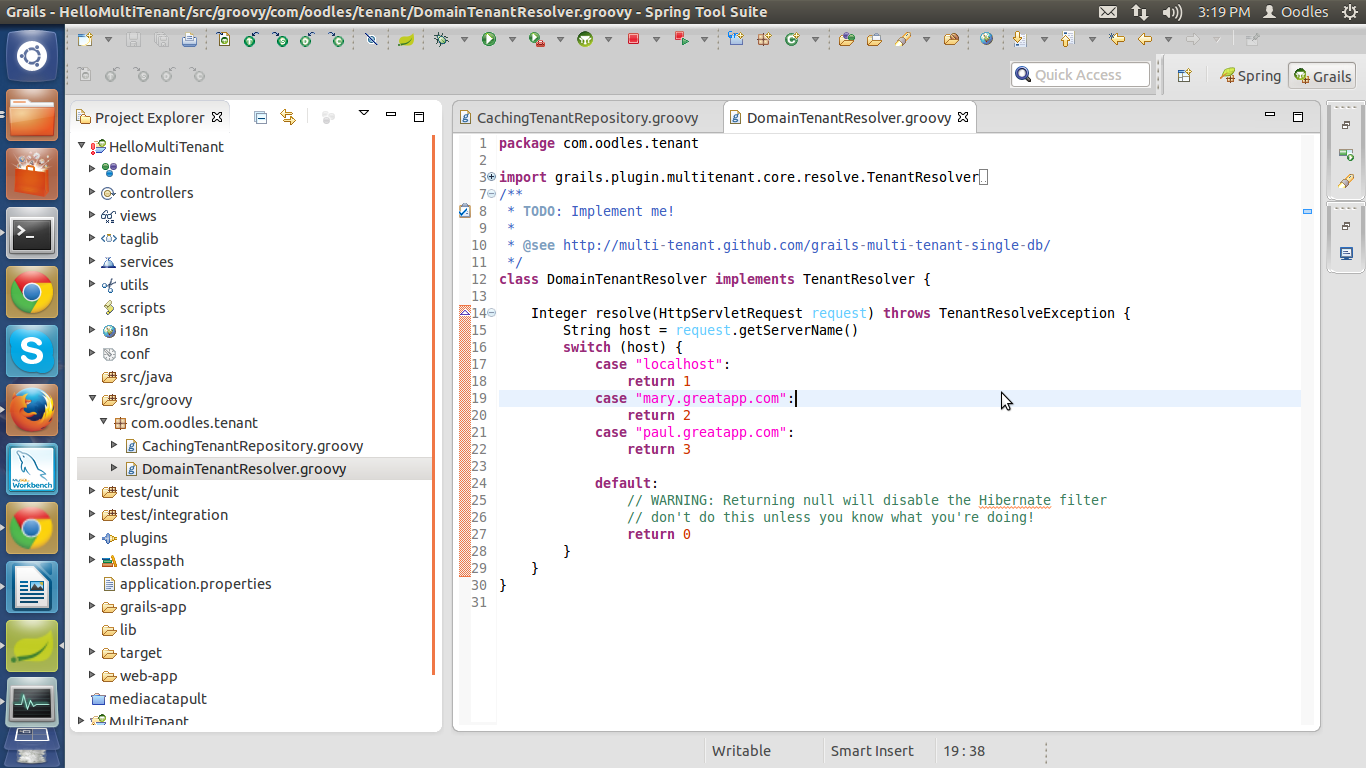
DomainTenantResolver.groovy
In my example i'm creating tenants based upon host.
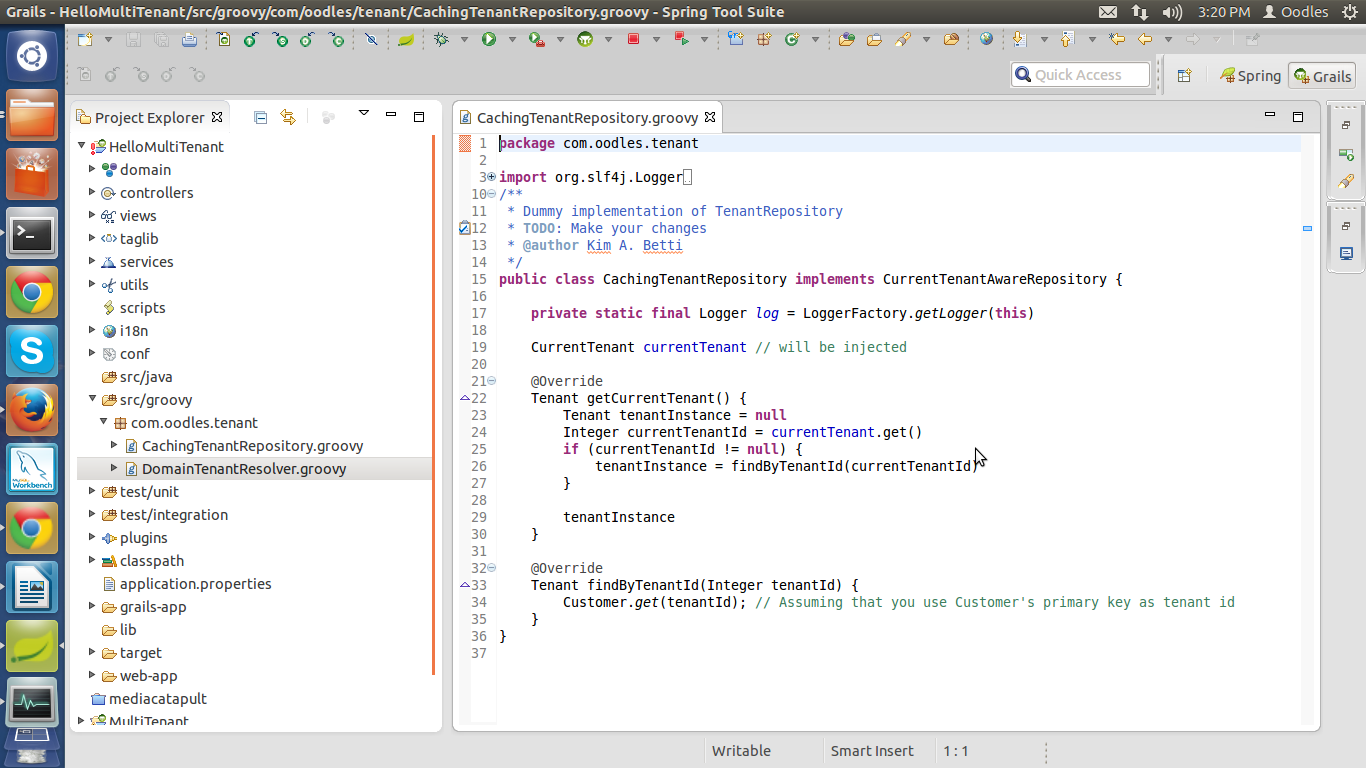
CachingTenantRepository.groovy
Step 5 :
The above script will make an entry in Config.groovy at the bottom of the file.
HelloMultiTenant>conf> Config.groovy
Entry will look something like this.
 // Added by the MultiTenant plugin
// TODO: Verify that this is correct
multiTenant {
    tenantClass = com.oodles.tenant.Customer
}
Step 6 :
The above script will make an entry in resources.groovy at the bottom of the file .if the below entries are commented then make them uncomentted.
HelloMultiTenant>conf>spring>>resources.groovy
Entry will look something like this.
  beans = {
	tenantResolver(com.oodles.tenant.DomainTenantResolver)
	tenantRepository(com.oodles.tenant.CachingTenantRepository)
}
Step 7 :
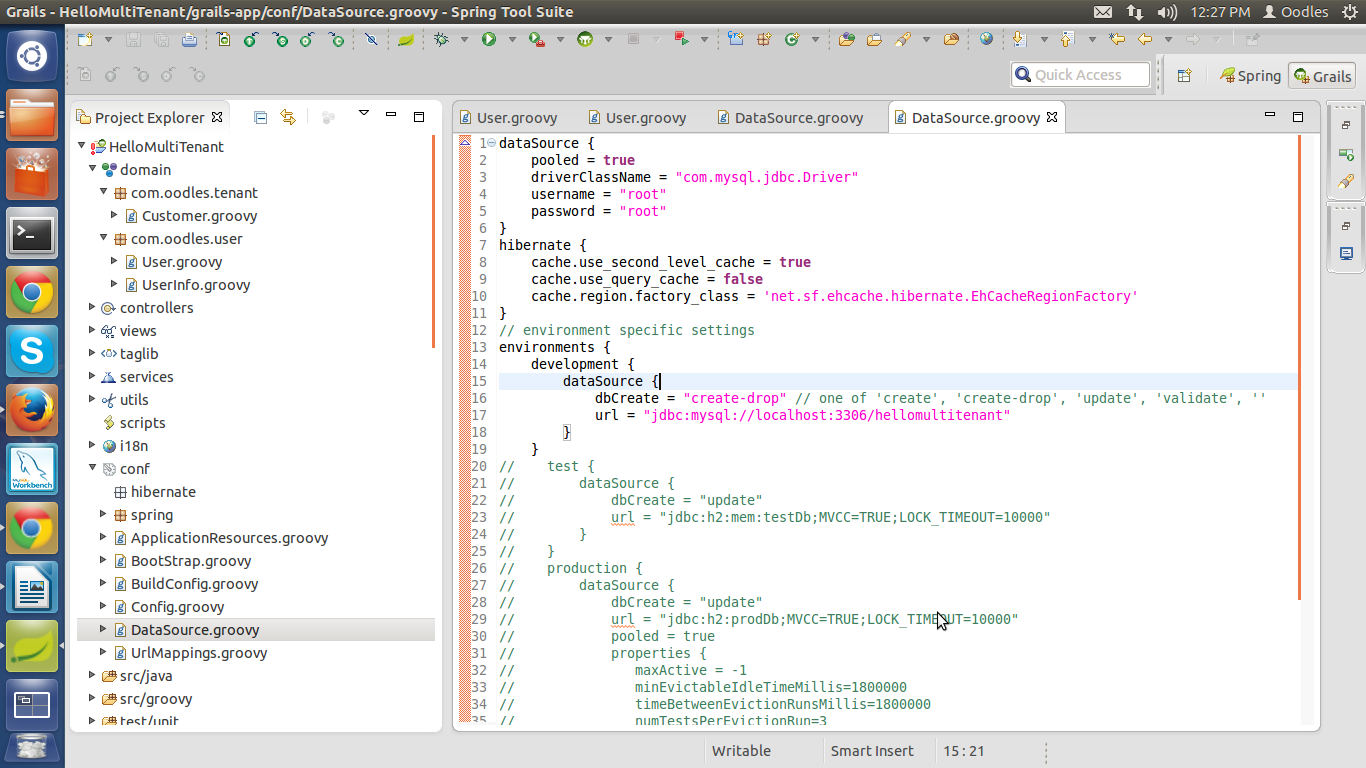
Now please update DataSource.groovy.This is updated so that i can work with mysql database you can choose database as per youre choice and make appropriate entries.
HelloMultiTenant>conf> DataSource.groovy
In my project changes which i made in DataSource.groovy are :
  driverClassName : com.mysql.jdbc.Driver
 username              : root
 password             : root
 url                         :jdbc:mysql://localhost:3306/hellomultitenant
File will look something like this.
Step 8 :
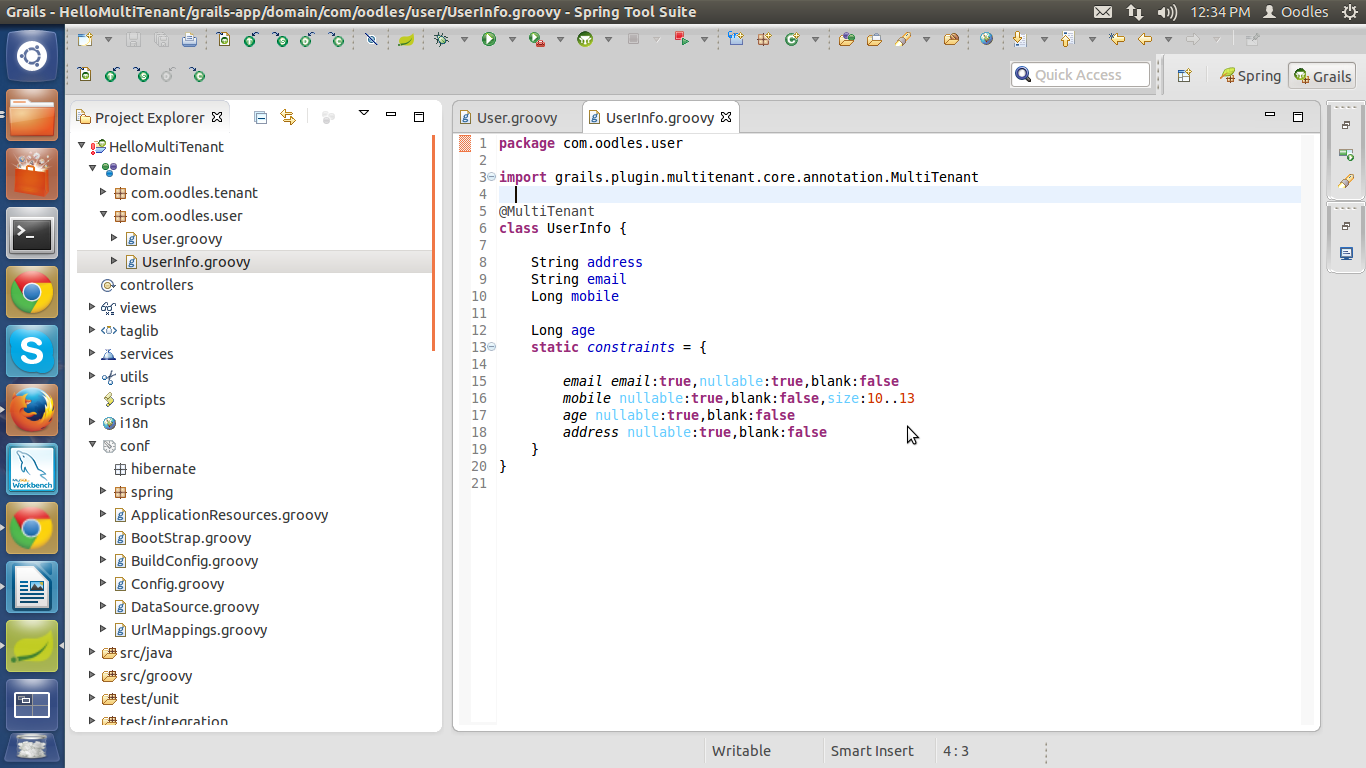
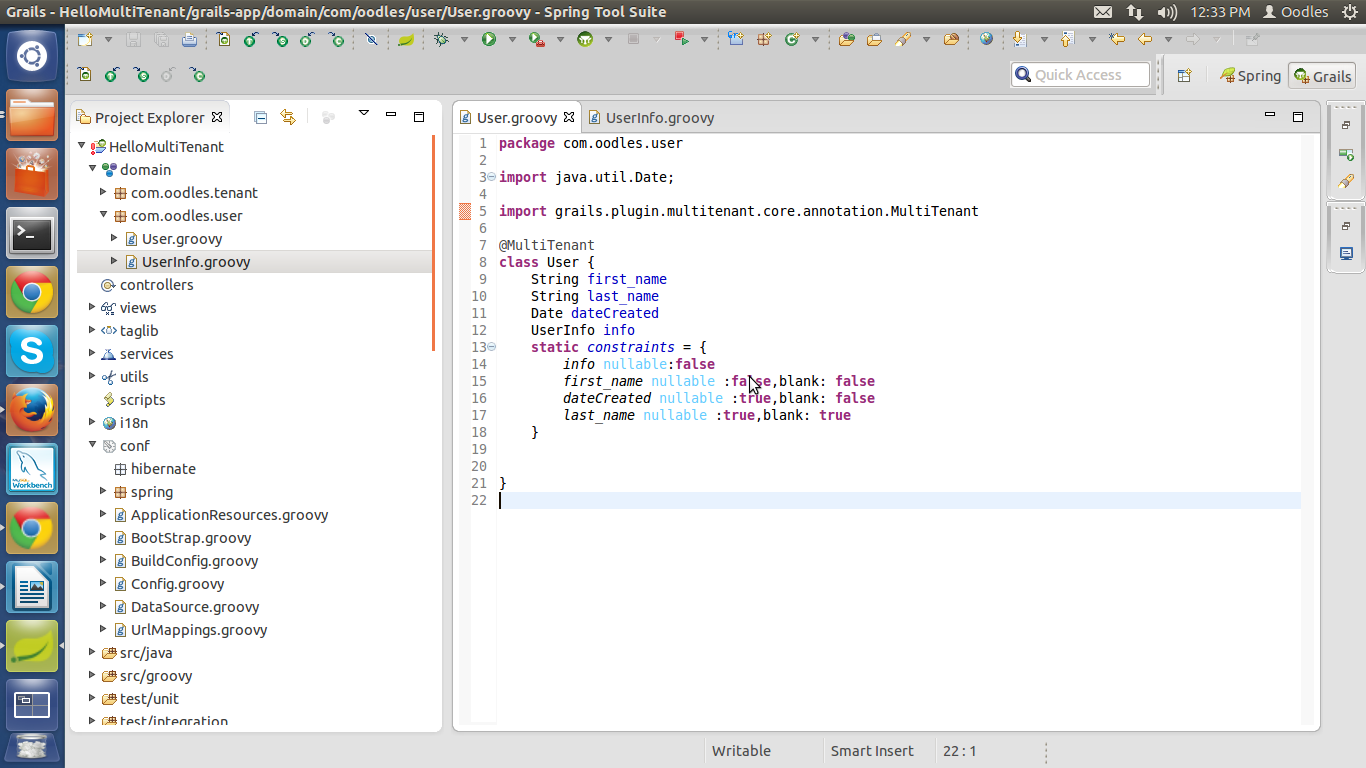
Now create two domains in the domain section.
User.groovy
UserInfo.groovy
HelloMultiTenant>domain> package-name> User.groovy
HelloMultiTenant>domain>package-name> UserInfo.groovy
File will look something like this.
Step 9 :
Now create one controller in controller section.
UserController.groovy
HelloMultiTenant>controller> package-name>UserController.groovy
File will look something like this.
package package-name


class UserController {

	def index() {

		redirect action:'showUser'
	}

	def showUser() {
		println "Helloo"
		def userList
		if(User.list().size()>0)
		{
		 userList=User.list();
		}
		userList.each() { print " hello"+it.getFirst_name() };

		render view:'showUser',model:[userList:userList]

	}
	def addUser() {

		render view:'addUser'
	}

	def deleteUser() {
		def msg
		def user
		println "parameters are :"+params
		try {
			 user=User.get(params.id)
			user.delete();
			msg="Record Successfully Deleted!!!"
		}
		catch(Exception e) {
			msg="Record Not Deleted!!!"
			println "problem :"+e
		}
		redirect(uri:'/')

	}

	def editUser() {
		def user
		println "parameters are :"+params
		try {
			user=User.get(params.id)
		}
		catch(Exception e) {

			println "problem :"+e
		}
		render view:'editUser',model:[user:user]
	}


	def saveUser() {

		try {
			String mobile=params.mobile

			println "saveUser"+Long.parseLong(params.mobile)
			def userInfo1= new UserInfo(mobile    :Long.parseLong(params.mobile) ,email:params.email,address:params.address)
			userInfo1.save()
			def user=new User(first_name:params.firstName,last_name:params.lastName,info:userInfo1)

			user.save()
		}
		catch(Exception er) {

			println "problem : "+er.getMessage()
		}
		redirect action:"showUser"
	}


	def updateUser() {
		try {

			String user_id=params.user_id
			def user1=User.get(user_id)
			user1.first_name=params.firstName
			user1.last_name=params.lastName
			user1.info.email=params.email
			user1.info.address=params.address
			user1.info.mobile=Integer.parseInt(params.mobile)
			user1.save()
		}
		catch(Exception er) {

			println "problem : "+er.getMessage()
		}
		redirect action:"showUser"
	}
}
Step 9:
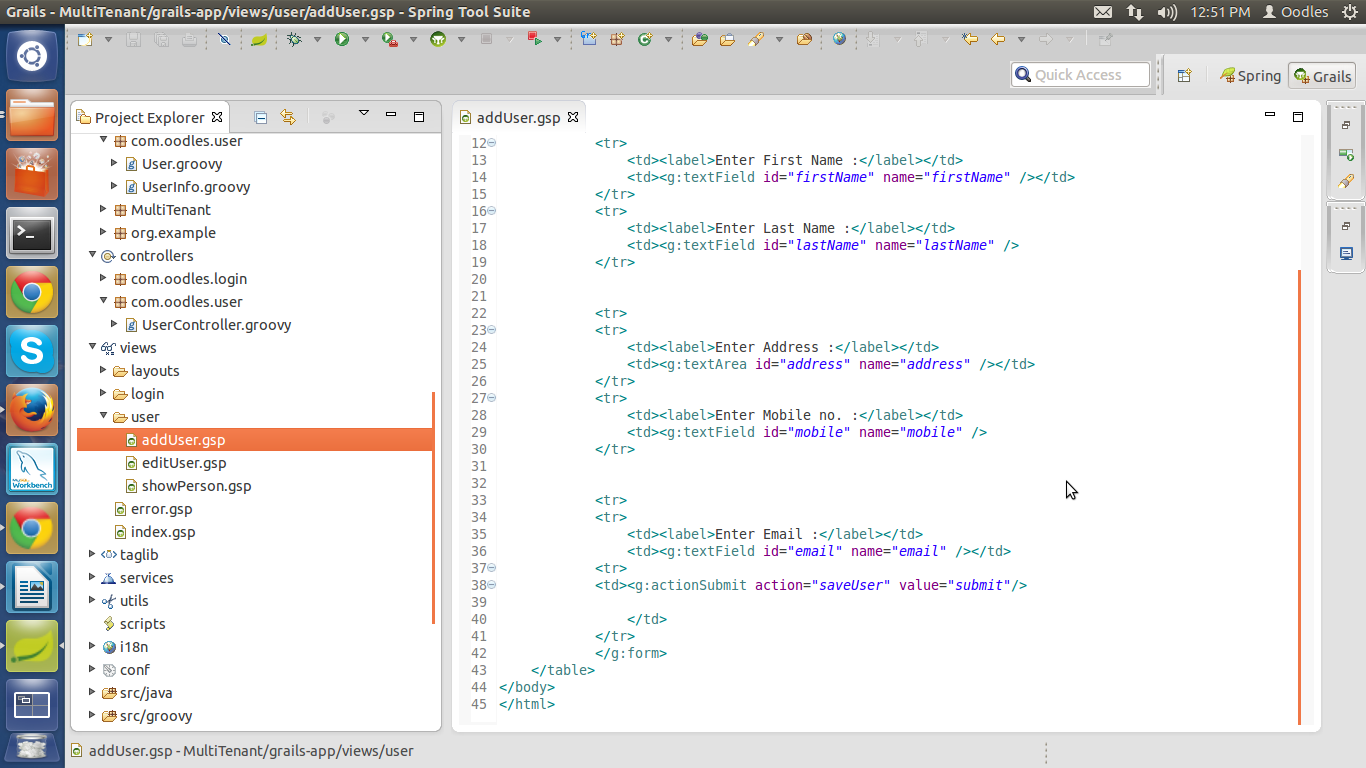
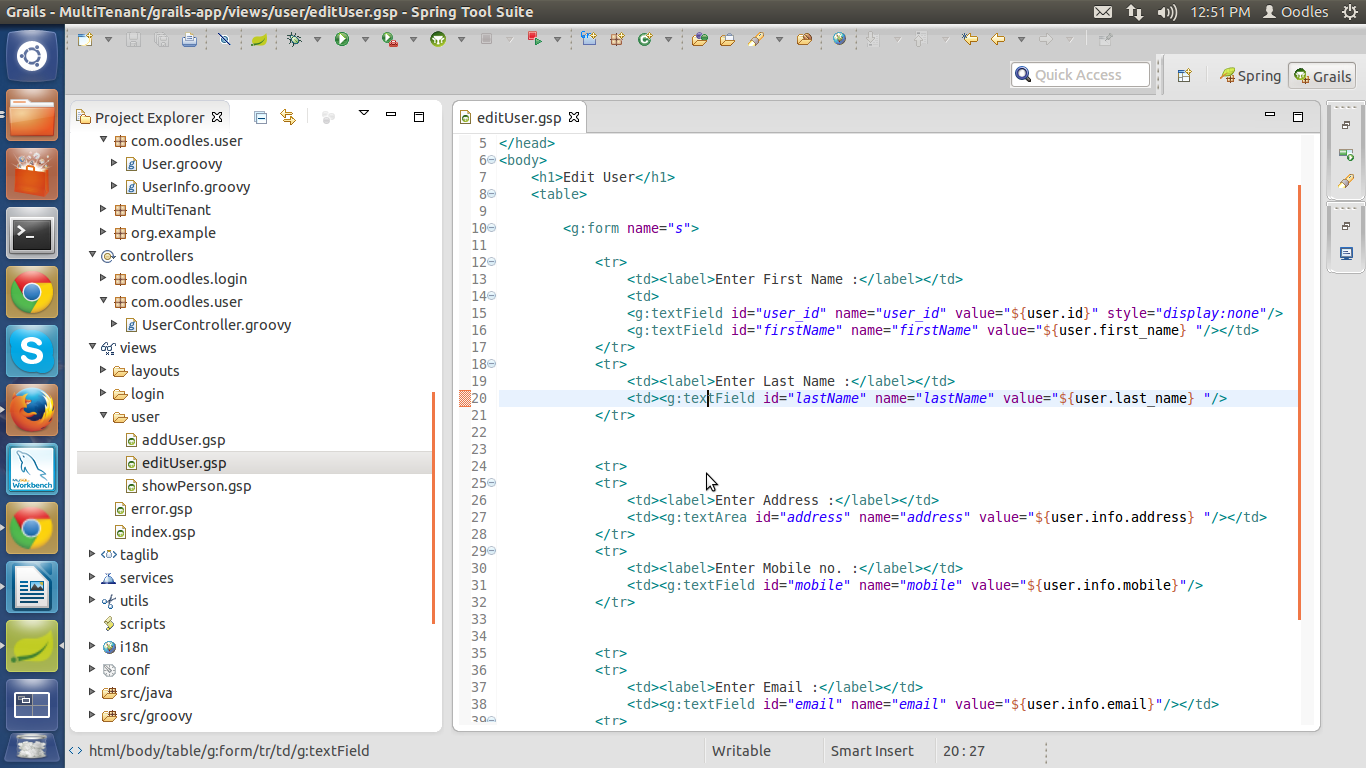
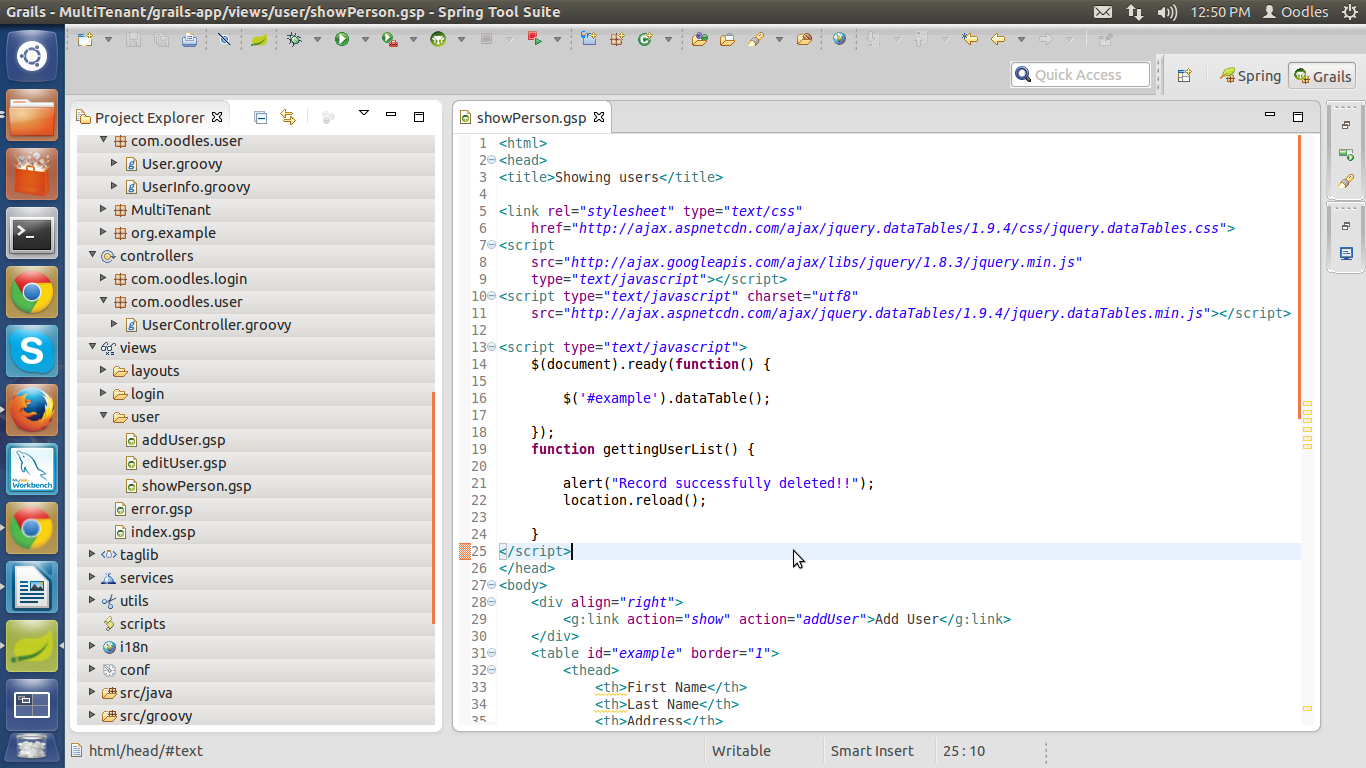
Now create three gsp file in view section.
addUser.gsp
editUser.gsp
showUser.gsp
HelloMultiTenant>view> user> addUser.gsp
HelloMultiTenant>view> user> editUser.gsp
HelloMultiTenant>view> user> showUser.gsp
File will look something like this.
addUser.gsp
editUser.gsp
showUser.gsp
Step 10:
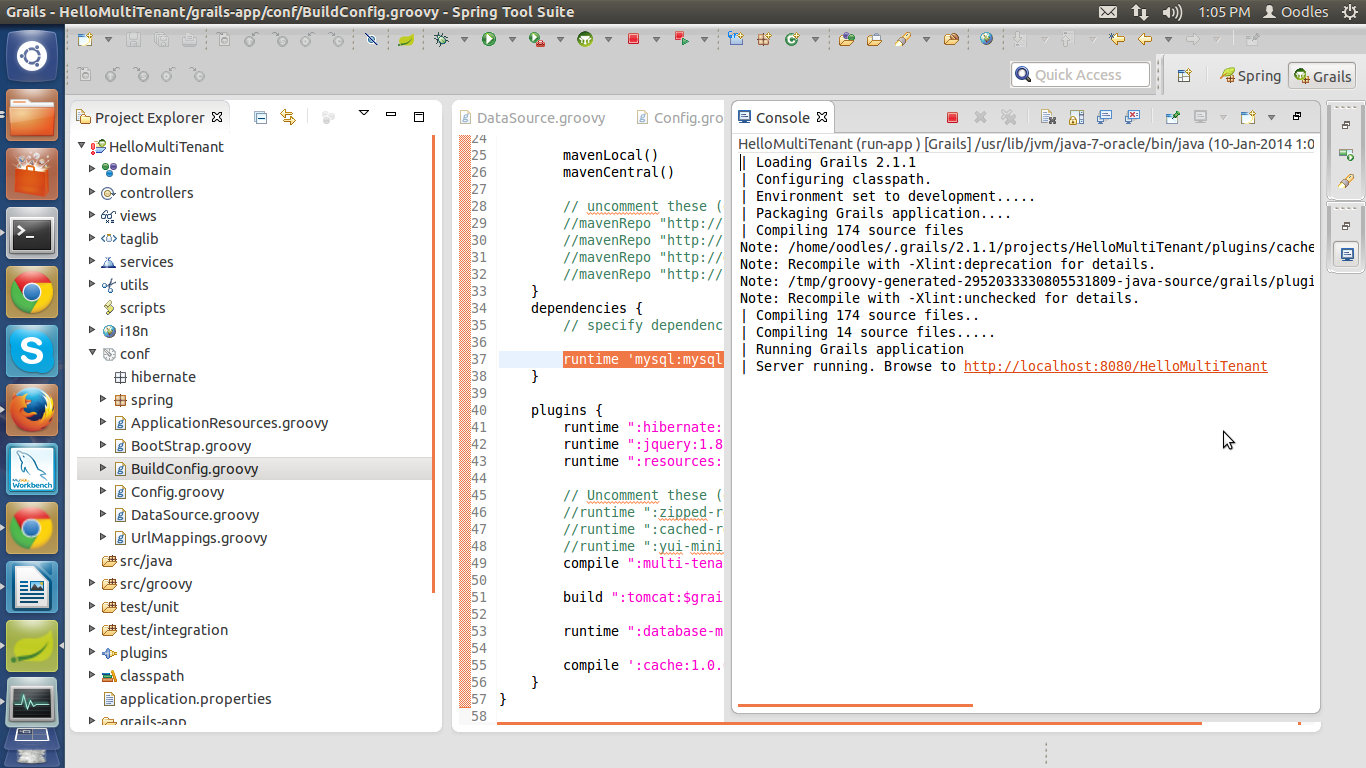
Now open the grails command prompt and run the script :
run-app
Output at consol :
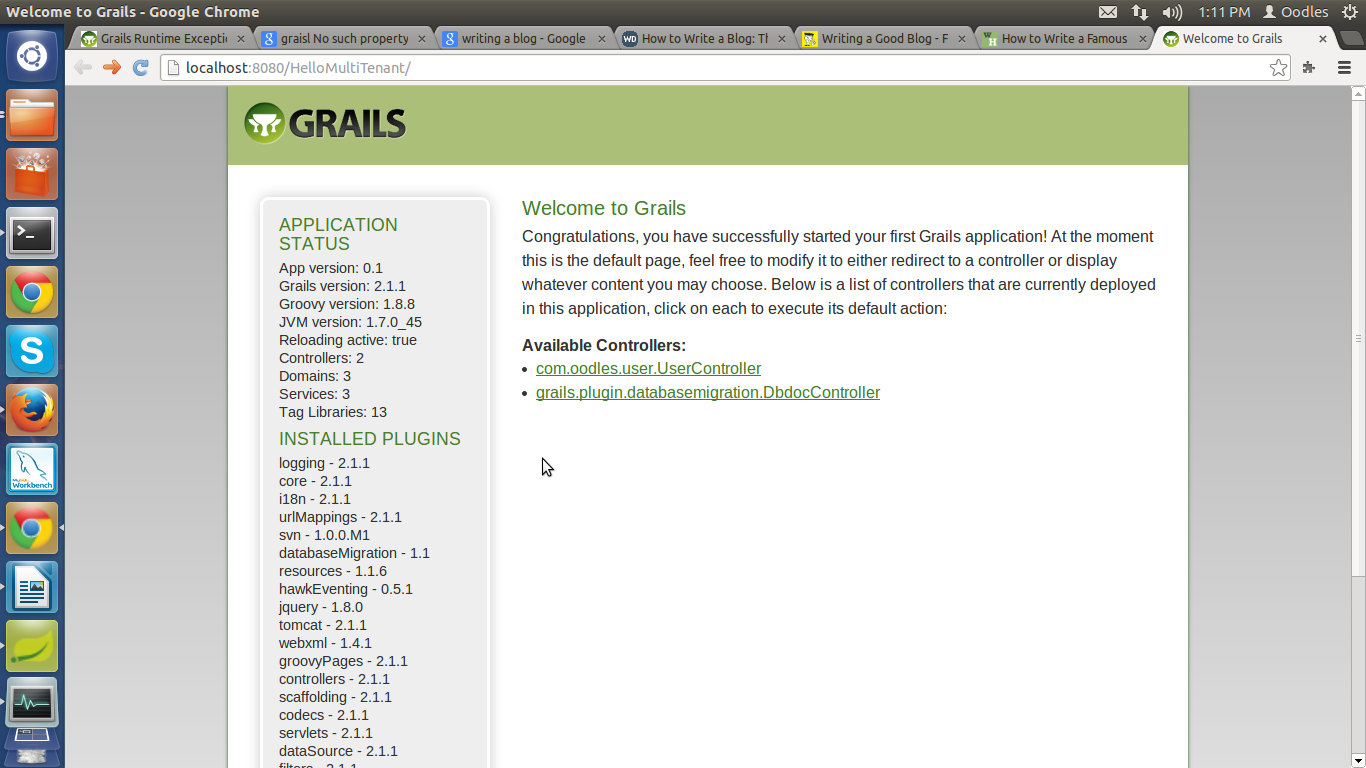
Output at browser :
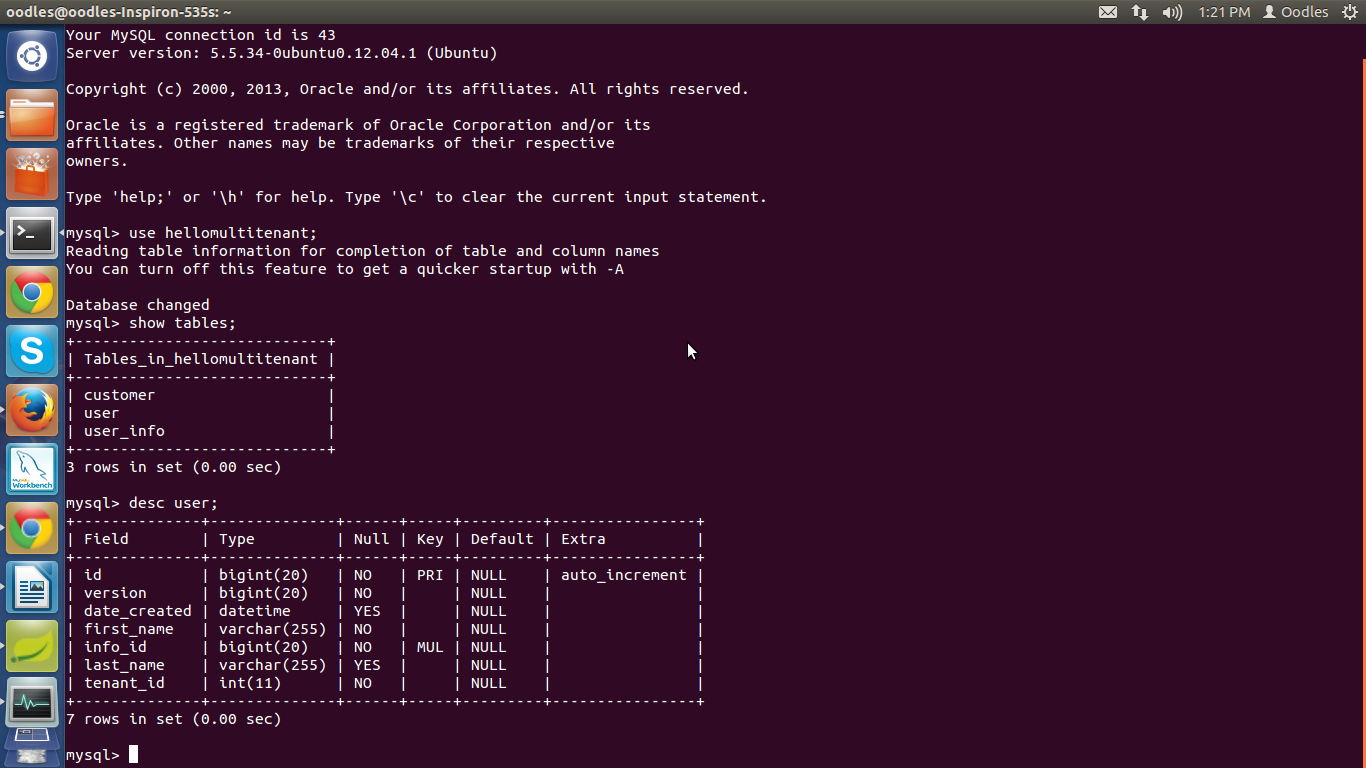
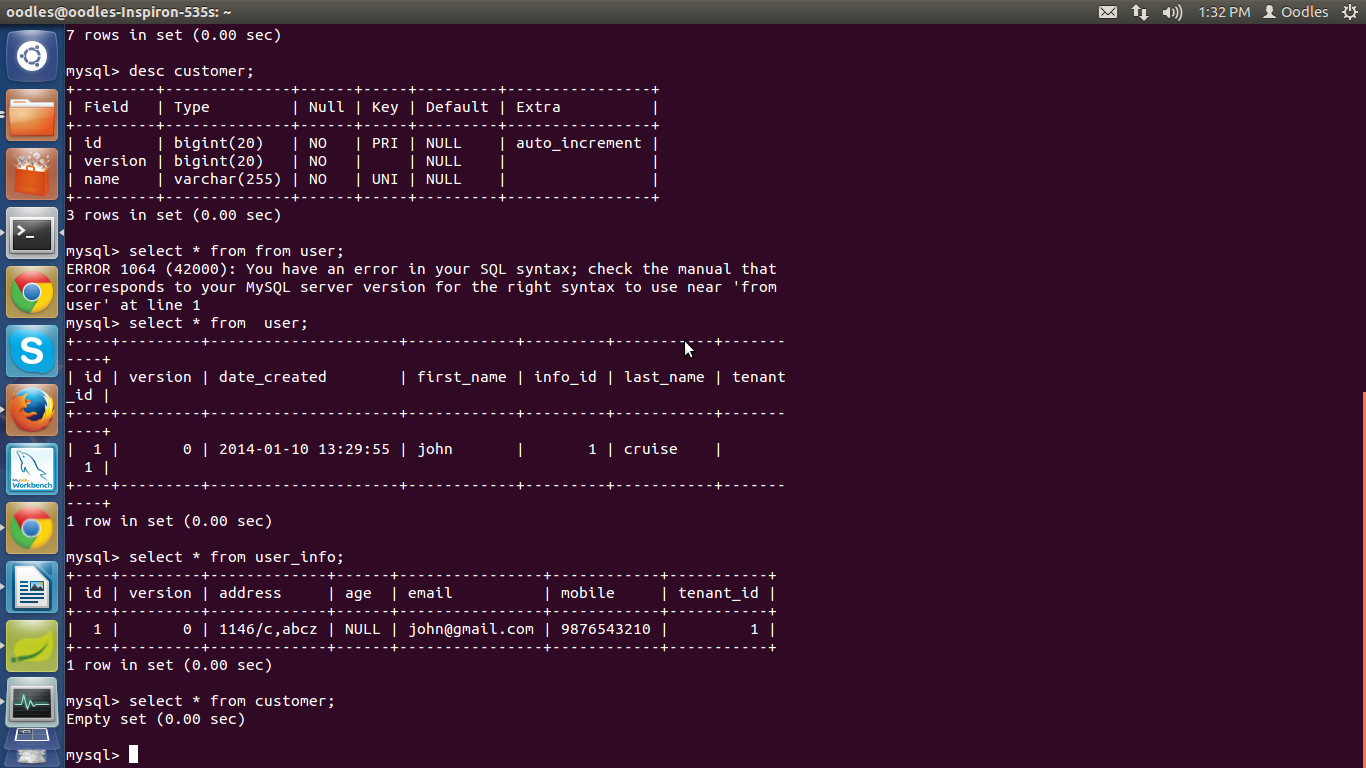
Output at database :
Here it will create three tables customer,user,user_info and user,user_info will have an extra field with the name tenant_id which will help in filter of data of each user.
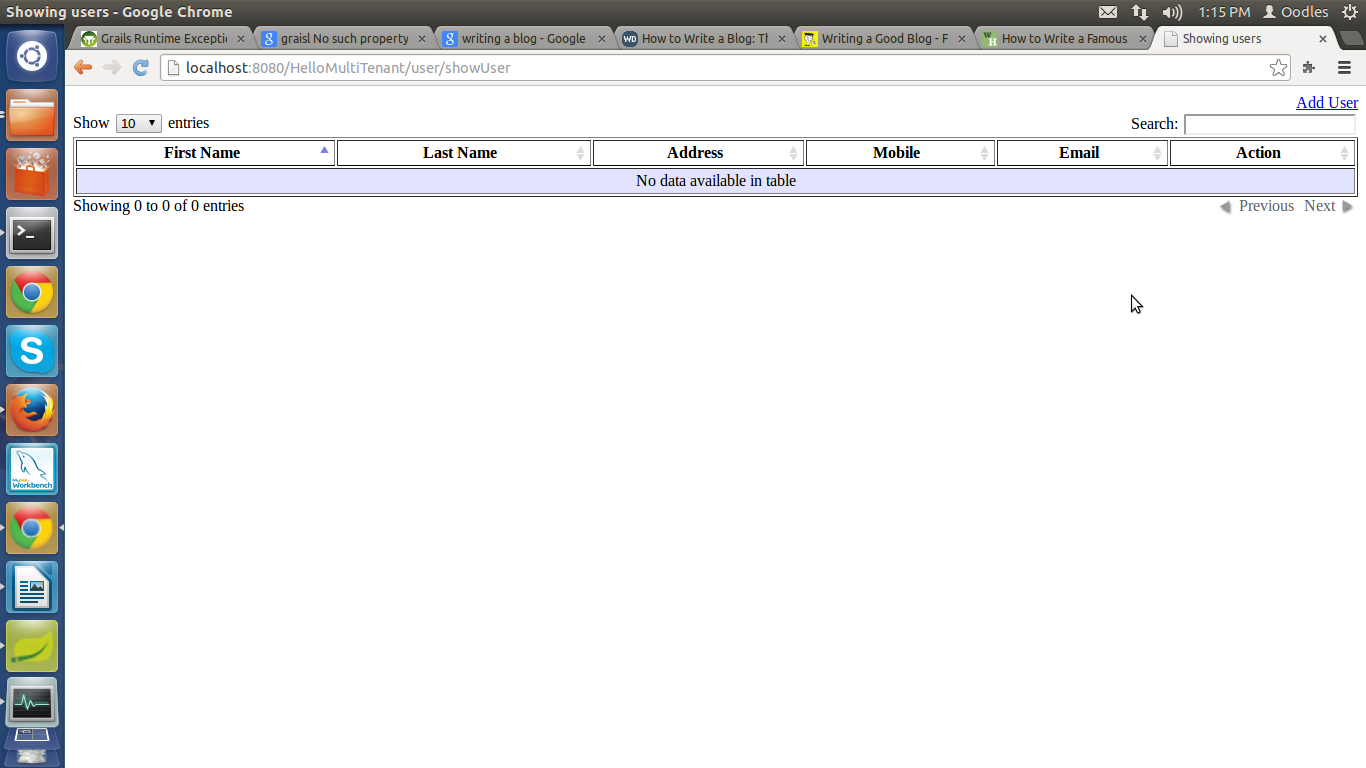
Click over UserController Link :
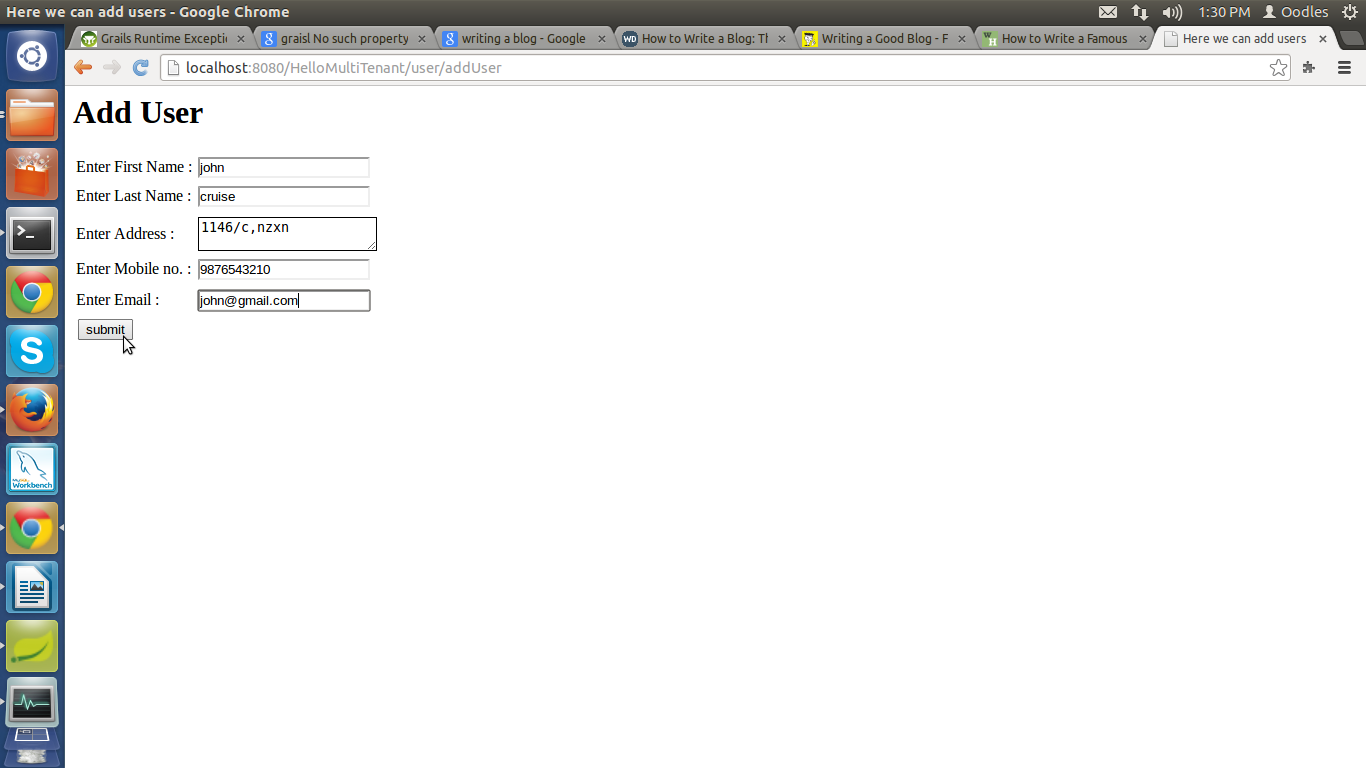
Step 11:
Now Make an entry of user by click over addUser Link :
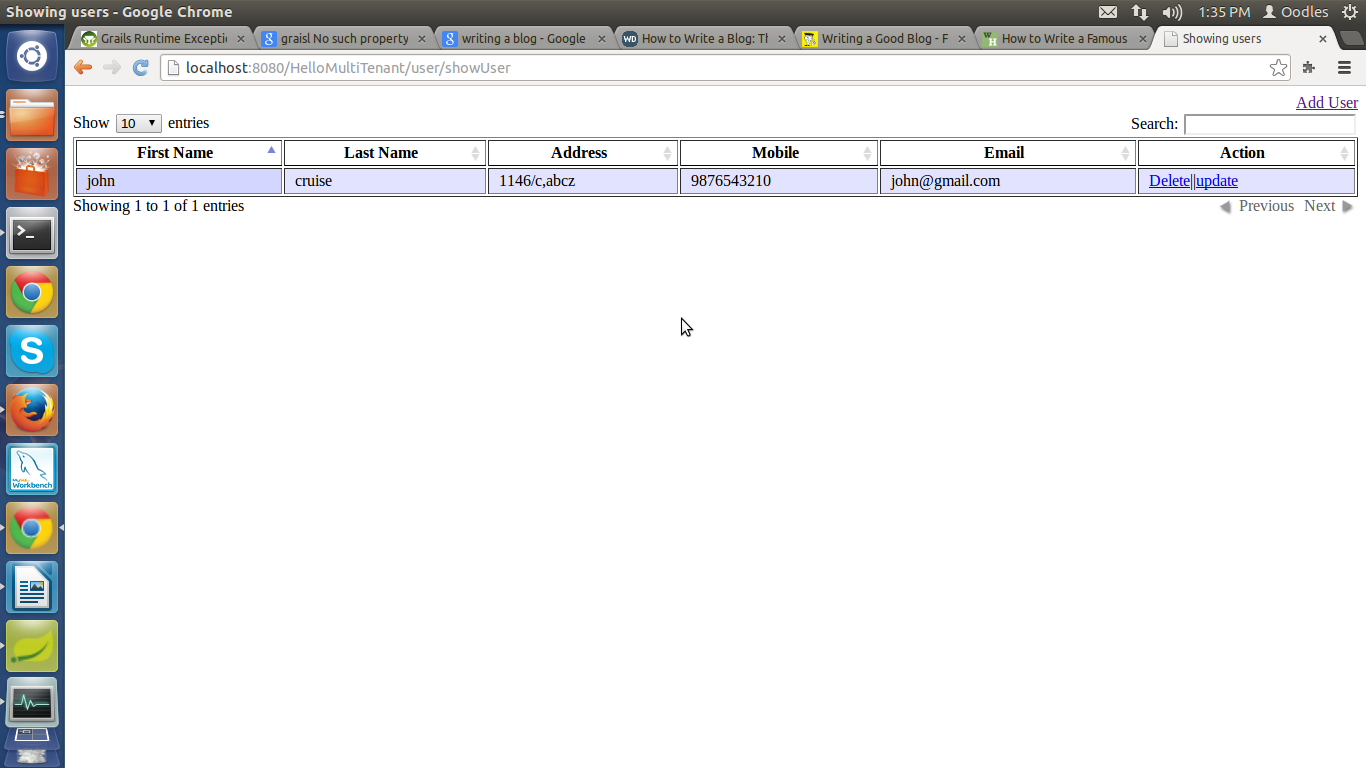
Step 12:
After click over submit button output :
Here in tables each row will save with its associated tenant_id which is generated by tenant resolver.
Output at database :
Output at browser :
Thank You


Cookies are important to the proper functioning of a site. To improve your experience, we use cookies to remember log-in details and provide secure log-in, collect statistics to optimize site functionality, and deliver content tailored to your interests. Click Agree and Proceed to accept cookies and go directly to the site or click on View Cookie Settings to see detailed descriptions of the types of cookies and choose whether to accept certain cookies while on the site.


About Author
Tushar Paliwal
Tushar is a developer with experience in Groovy and Grails , Spring and enterprise Java Technologies.